All changes to Rates and Restrictions are done in SETUP | RATE | MANAGE RATES after a default Rate Plan is created. Once a default Rate Plan is set up, then it will appear in the drop-down list in Manage Rates, If you need to add a new Rate Plan or change the description of the Rate Plan, see Default Rates
The Manage Rates feature allows you to quickly and fluidly set special conditions (price surcharges and minimum stays) for a specific day or date range up to 57 weeks in advance. Often, this is used to manage rates for peak periods – Long Weekends, Special Events, Holidays, Weekly Rates, etc.
The Manage Rates function allows you to make the following changes to the rates for the date range specified. For details on each, see Manage Rates
Rates
- Number of guests included in rate
- Modify Rate amounts
- Additional Adult Charge
- Additional Children Charge
- Weekly Rates ( If enabled)
Restrictions
- MIN LOS, MAX LOS
- Closed to Arrival
Each Rate Plan is assigned it's own Rates and Restrictions. .
- Rates can be managed individually (Manage Single Rate) or changed for multiple Rate Plans (Manage Multiple Rates) at the same time.
- Restrictions are unique to each Rate Plan and must be adjusted individually.
Therefore,when changing Restrictions, you must make the changes to each of the Rate Plans you need to adjust. When changing Rates, you can either adjust one rate at a time or make a % or $ adjustment to multiple rates at the same time.
Manage Single Rate Plan is managed and prices adjusted for each date range.
Multiple Rates at one time: If you want to make percentage or dollar changes to more than one rate at a time, then you can choose the Multiple Rate option.
All Rate Plans must be managed individually. To get started, follow these steps. For details on each, see Manage Rates
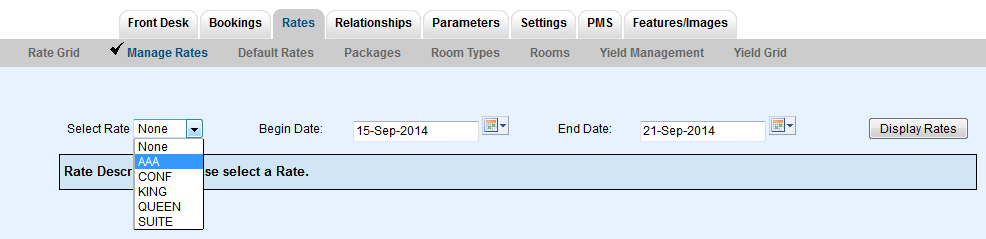
- Go to RATES | MANAGE RATES. See figure 1.
- Choose the Rate Plan to manage from the drop-down list and the date range, then click Display Rates. A screen will automatically appear with the Rate Plan Information by Date. See Figure 2. below.
- When you select a rate and a time frame and press Display Rates, the system automatically loads the rate for that time frame. If you've never edited the rate or stay options for that time frame the system loads the Default Rate.
NOTE: The 'save' check box on the left determines if values for those fields are modified during the save process. It is enabled for all fields by default and should only be unchecked if you do not wish to modify a specific field.
For more details and step-by-step instructions on each section, see Modifying Rate Plans
Figure 1. Choose Rate Plan
Managing Rate Plan
Figure 2. Manage Rate Plan
Overview
Content Tools