Before you create a Room Type, you must have a Default Rate Plan in place to assign to it. After Rate Plan is set up, then the Room Type is created and the Rate is assigned to it. The last step is to assign the Rooms that belong to the Room Type.
 Click image to enlarge
These Rate Plans will be used when bookings are made at the front desk and online through your website or OTA channels.
Rate Plans allow you to create the different rate structures for the different room types you offer. The Rate Plans you setup here appear in guest folios, statements and anywhere your rooms are sold online like your website and OTA channels.
Rate Plans define unique rates for weekdays and weekends, the number of occupants, minimum length of stay, etc. In Step 5 we will create the room types and apply the Rate Plans created in this step.
Complete Step 4- Rate Plans
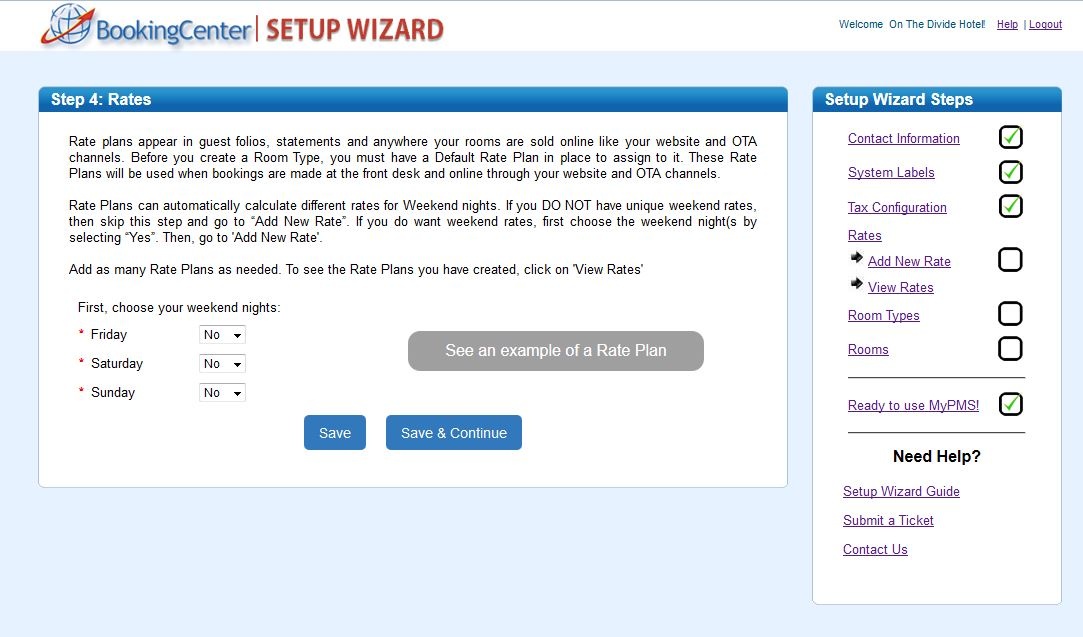
This section will walk you through adding your basic rate plans. First, choose your weekend nights if applicable, You can choose to use the default setting of Friday and Saturday and skip to "Add New Rate".
There are two steps to complete in this section:
First, choose your “weekend nights”. This will allow you to automatically enter different rates for weekends. By default we have set the weekend days to Friday and Saturday, but you can change these settings here. For example, if do plan on entering specific weekend rates, then these rates will apply to one or all weekend nights (Fri-Sun) you choose.
Choose "Yes" from the drop down menu next to each night you want to set as a weekend night in the rate plan.
 `
`
Click image to enlarge
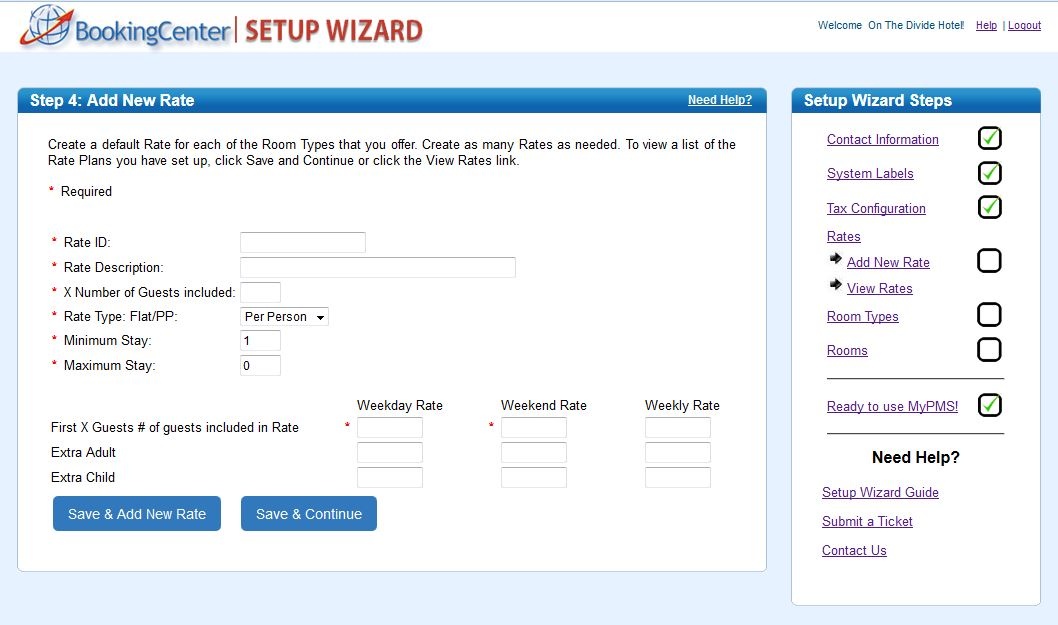
The next step is to add the first Rate Plan. "Add New Rate"
- Click "Save & Continue" or “Add New Rate”
- Enter your first rate plan. See the example below.
- Enter a Rate ID, up to 8 Characters, and a description for each rate plan that will correspond with a selected Room Type.For Example _Standard Queen Rate would correspond with a QUEEN room type.
- Then, choose Per Person or Flat Rate. The per person option allows you to charge for extra guests.
- Enter the weekday, weekend and weekly rates. If you do not have weekly rates, just enter the weekday rate.
- If you chose “per person” rate, then enter the amount you charge for extra Adults, Children and/or infants.
- Repeat this process until you have added all of your Rate Plans.
To view Rate plans or make changes, click “View Rate Plans.”
Click ‘Continue’ once you have entered all of your Rate Plans.
Click image to enlarge
Overview
Content Tools