Versions Compared

Key

  • This line was added.
  • This line was removed.
  • Formatting was changed.
Section
Column

Now that you have created your Room Rates and Room Types, you can add individual Rooms.Each Room is typically entered as a number, letter or a name. For example, Room 101, Room A or Lake Suite  The last step is to set up your Rooms and assign them to Room Types. All Rooms must be linked to a Room Type.

These Rooms will be visible and available in your Front Desk and through any distribution channel (MyPMS, Website bookings, GDS, etc) in which the corresponding Room Types are allocated.

Each Room can be set up with a unique Room ID and description to fit your property. Typically, a property will use a number, letter or name. For example, 101, A, or Lake Suite.

Remember, rates are allocated by room type so a Room will inherit the rate of the Room Type it is assigned to. For example, Room 101, 102 and 103 are all assigned to the QUEEN Room Type with a rate of $84.

Add as many Rooms as needed by clicking "Add New Room".

To see your Rooms or to make changes, click "View Rooms."All Rooms must be linked to a Room Type. 

Column
width40%30%
Panel
borderColor#559ADE
bgColor#F0F0F0
titleColor#ffffff
titleBGColor#559ADE
borderWidth1
titleSelf Setup Wizard Guide
Page Tree
rootSetup Wizard Guide


Section

Image Added

Tip
iconfalse

Example of Room

  • Room ID: 101
  • Description: One Queen Bed.
  • Publish to the internet:Yes
  • Room Type: QUEEN

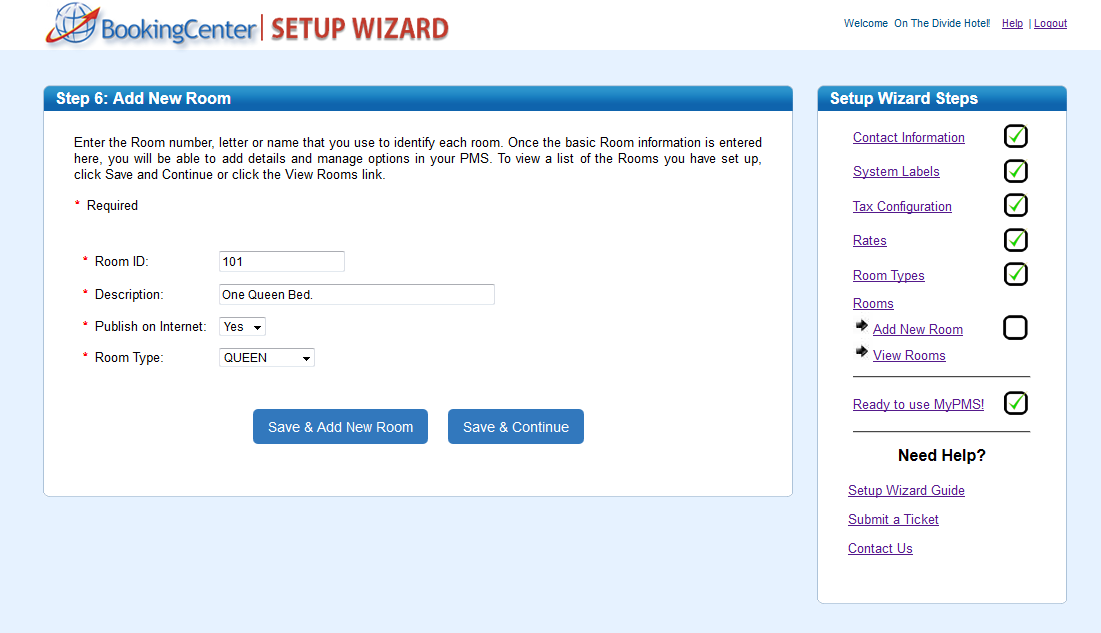
Add Rooms

Enter the Room number, letter or name that you use to identify each room. Once the basic Room information is entered here, you will be able to add details and manage options in your PMS. To view a list of the Rooms you have set up, click Save and Continue or click the View Rooms link.

To add a Room, Click Add Room

  • Room
Section

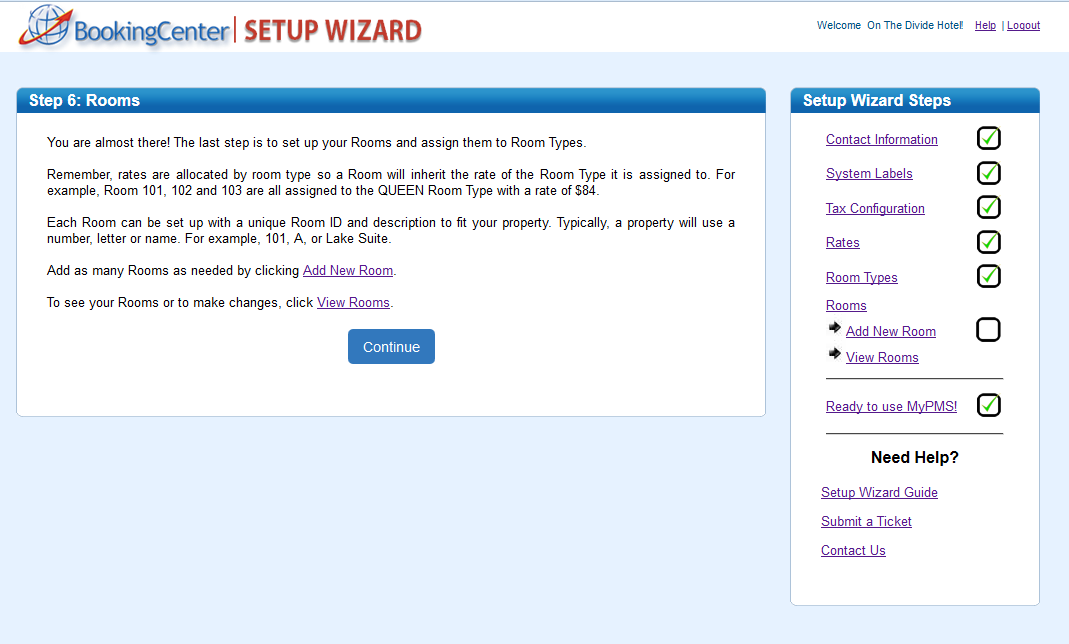
Enter your Rooms

Set up your Room Types. This section of the Wizard will walk you through adding your room types with basic description, bed count and max guest count etc. Once you have your Room Types defined and added here, we will identify the rooms or room numbers associated with these types.
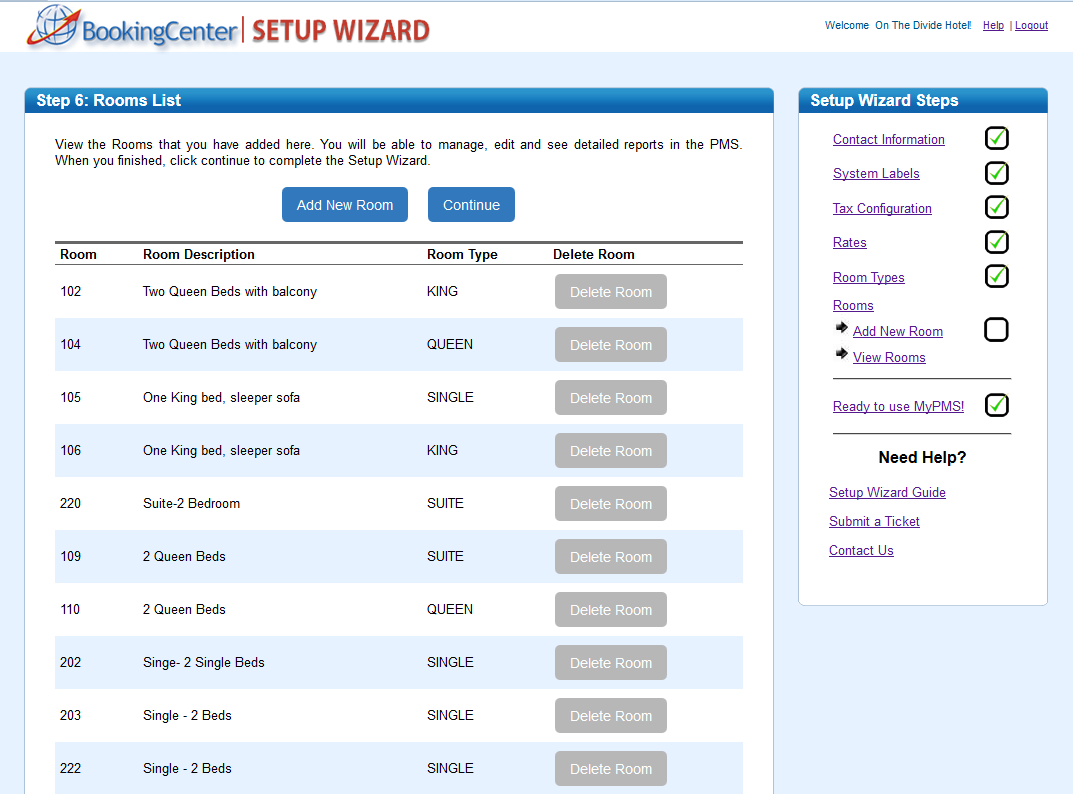
  • Room ID: Enter the #, letter or name that you use to identify the room.
  • Description: This will appear in guest folios,  confirmation letters, statements and receipts.
  • Publish to the internet: choose yes to make  this room available online through your Website, GDS, OTA and Agent Channels.
  • Room Type: Choose from the Room Types that you have already created.
To see your

Image Added


View Rooms

To view Rooms or

to

make changes, click “View Rooms.”

Tip
iconfalse
  • To edit a Room, double click on the Room and edit.
  • To delete a Room, click Delete to the right of the Room.


Image Added


Example of Rooms

  • Room ID: Enter the #, letter or name that you use to identify the room.
  • Description.
  • Publish to the internet
  • Room Type: Choose from the Room Types that you have already created.