Each booking has an option to be flagged as "Self Check-in Exempt" and/or "eSign Exempt" and these settings are managed via the Booking Data tab on the specific booking desired to be 'exempted' from the automated Self Check-in process. When flagged "Self Check-in Exempt", that particular booking will not send Self Check-in Letter(s) and/or SMS messages. When flagged "eSign Exempt", that particular booking will not require the eSign document be completed to enable a Self Checkin-in, but it will still be allowed Self Check unless "Self Check-in Exempt" is also flagged on.
See below for examples. See Cancelled Booking and Same day check out See the examples below for details on the active buttons available for the status of booking. Completed Booking 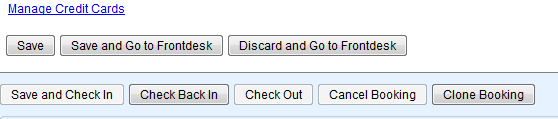 Image Added Image Added
Confirmed Booking  Image Added Image Added
New Booking  Image Added Image Added
In order to re-set existing bookings to the correct guest, please do the following: To replace the current guest data with a new guest to your system: - Open the booking you wish to edit.
- In the Guest Data, replace the information with the correct information for the new guest. Then click the 'Reset Guest ID' link. The Reset Guest ID tells the system to create new guest id when you press Save or 'Save and go to Front Desk'. The example at right shows the Guest Information section after new guest information has been input and the Reset Guest ID link has been used.
- You will notice the Guest ID field is now blank and you can still undo your changes by pressing 'Discard and go to FrontDesk'. To finalize the change press either Save or 'Save and go to FrontDesk'.
To replace current guest with a existing guest: - Search for the booking by Confirmation #s (Ex. AD01450303)
- Under Guest Data, Remove the existing guests last name, and enter the correct/new guests last name. If you are changing the booking to a guest who is already in the system you can select that guest from the EZ-Search drop down. Upon selecting the new guest from the EZ Search drop down all guest information will be updated. Click Save or Save and go to Front Desk and you're done.
- Enter the new guests information and click Save.
- Once a reservation has been cancelled, checked out or declared a no-show, the following fields are not editable: arrival date, departure date, rate, rate type, room type and room number.
Repeat as necessary. |