Page History
| Section | ||||||||||||||||||||
|---|---|---|---|---|---|---|---|---|---|---|---|---|---|---|---|---|---|---|---|---|
|
To Add a Room: Click on Add at the bottom of the Room List.
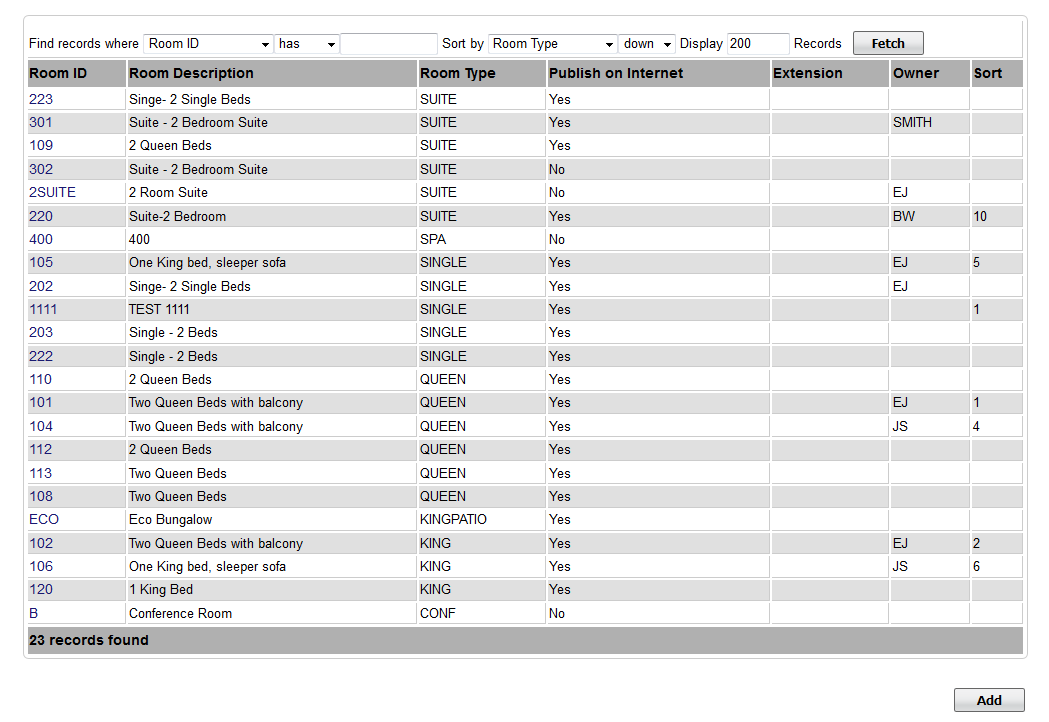
Click on Add at the bottom of the Room List.
Room ID: I.D. for Internal use only and will not be viewed by guests. I.D. must be alpha/numeric only. Do not use punctuation, symbols or hyphens. Use a max. of 10 Characters, 5 characters or less is preferred. Enter the #, Room name letter or name that you use to identify the room. For example, 101, Room A, Romance Suite.
Description: This will be visible tocustomer
Room Type: Choose the Room Type that this individual Room should be associated with.
Publish to Internet: This controls whether or not the room is available through online booking channels and is enabled by default. In cases such as an hourly conferenceroom you may not want guests to be able to book it online. To avoid this simply select NO
Phone Extension: Add the phone extension if you have the Call Module enabled.
Ignore on Occupancy Report: Set to "Yes" if you want this room to be ignored or not appear on the Occupancy Report. This is used for rooms that are not typically sold to guests.
Availability: Choose Daily, Weekly or Unlimited Bookings.
Beds: The number of beds will appear based on the number of beds enter in the Room Type that the room is assigned to.
Persons: The number of persons will appear based on what is entered in the Room Types.
Availability: Choose Daily, Weekly or Unlimited bookings.
Extra Persons:
Sort: Enter the sort order of how the room will appear on the Tape Chart
Owner: If this an Owner Unit, choose the owner from the drop-down list. See Owner Units
Room Amenity Icons: Each Room can be assigned a Room Amenity icon that appears on the Tape Chart next to each room: Connecting Room, Smoking, Disabled Access, Pet Friendly. See Room Amenity Icons
Room Notes: Enter optional notes.
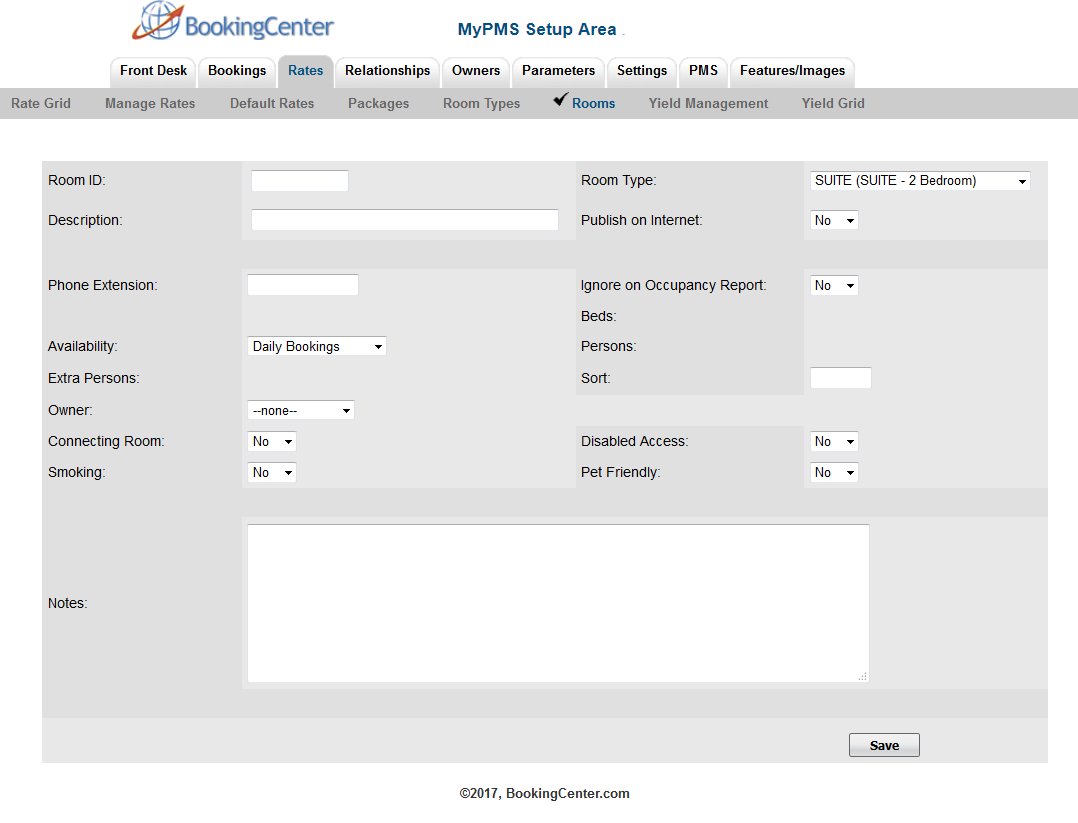
The Room Notes field can be used as a merge field in Letters. This is field a key part of the setup process for Self Check-in
Edit or Delete A Room:
Click on the Room I.D. and then click Edit at the bottom of the screen.

| Section | |||||||||||||||||
|---|---|---|---|---|---|---|---|---|---|---|---|---|---|---|---|---|---|
|
Overview
Content Tools