Page History
| Section | |||||||||||||||||||||||||||||
|---|---|---|---|---|---|---|---|---|---|---|---|---|---|---|---|---|---|---|---|---|---|---|---|---|---|---|---|---|---|
|
| Section | |||||||||||||||||
|---|---|---|---|---|---|---|---|---|---|---|---|---|---|---|---|---|---|
|

| Section | ||
|---|---|---|
Complete Step 4- | ||
| Section | ||
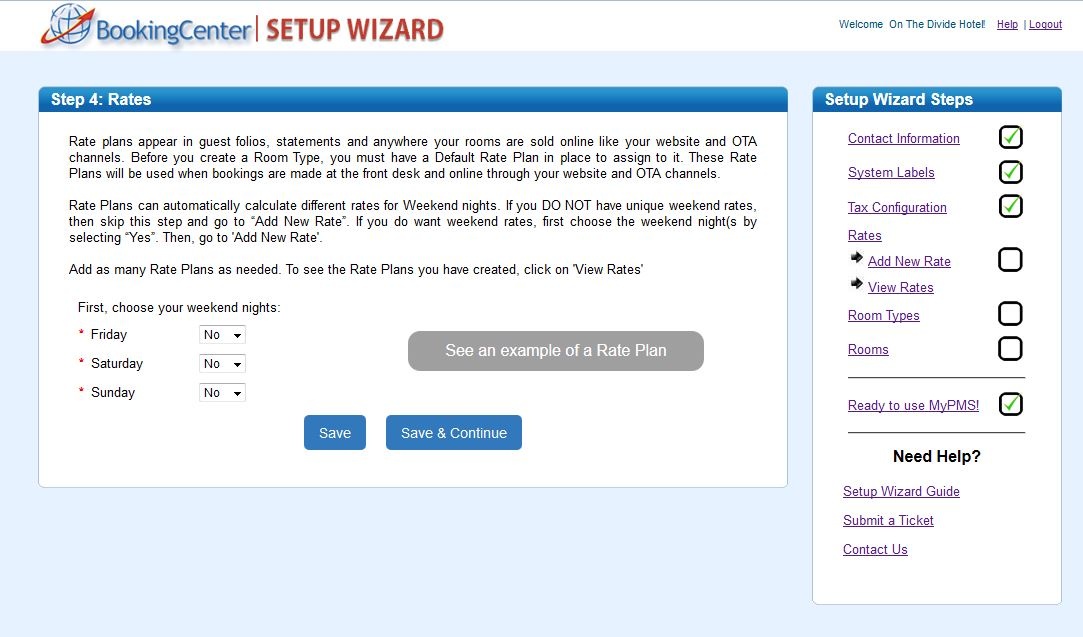
Enter your Rate PlansThis section will walk you through adding your basic rate plans for the specific rooms associated with your room types, including features and discounts. First, choose your weekend nights if applicable, You can choose to use the default setting of Friday and Saturday and skip to "Add New Rate". There are two steps to complete in this section:First, choose your “weekend days”nights”. This will allow you to automatically enter different rates for weekends. By default we have set the weekend days to Friday and Saturday, but you can change these settings here. For example, if do plan on entering specific weekend rates, then these rates will apply to one or all weekend nights (Fri-Sun) you choose.
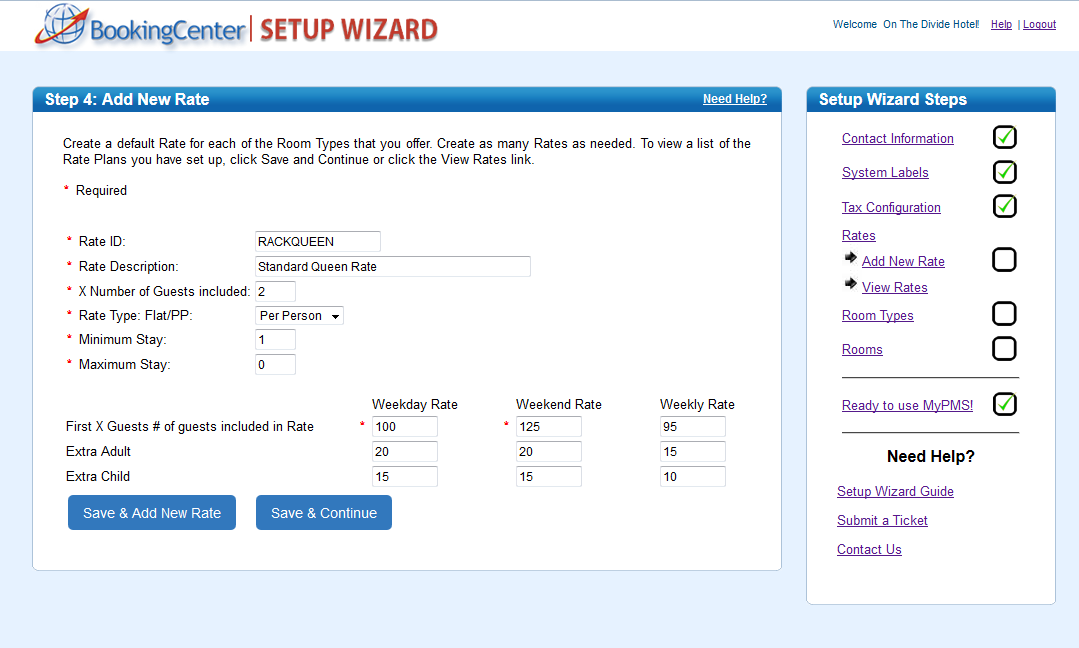
Click image to enlarge The next step is to add the first Rate Plan. "Add New Rate"
 To view Rate plans or make changes, click “View Rate Plans.”Click ‘Continue’ once you have entered all of your Rate Plans.
| ||
| Tip | ||
| ||
”
 |
Overview
Content Tools