Changing Guest for a Reservation
If there are multiple bookings for If you have multiple bookings under a single Guest Name, than then any time you edit that particular Guest's Data information, you are effectively editing it for ALL the reservations bookings that the guest is attached to. Sometimes this is what If you want to doedit the guest data for all of the bookings under that name, then editing one reservation, will change the data across all of the bookings. However, sometimes you may have made multiple reservations bookings under the same name and want to edit the individual Individual Guest Data to become unique to each reservationof each booking to a new Guest. To do this, you must Reset the Guest I.D. for the booking you are changing.
In order to re-set existing bookings to the correct guest, please do the following:  Image Removed Image Removed
To replace the current guest data with a new guest to your system: Search for by Confirmation #s (Ex. AD01450303)
Under - you wish to edit.
- In the Guest Data,
Remove and all of existing guests - information with the correct information for the new guest. Then click the 'Reset Guest ID' link. The Reset Guest ID tells the system to create new guest id when you press Save or 'Save and go to Front Desk'. The example at right shows the Guest Information section after new guest information has been input and the Reset Guest ID link has been used. You will notice the Guest ID field is now blank and you can still undo your changes by pressing 'Discard and go to FrontDesk'. To finalize the change press either Save or 'Save and go to FrontDesk'.
To replace current guest with a existing guest: - Search for the booking by Confirmation #s (Ex. AD01450303)
- Under Guest Data, Remove the existing guests last name, and enter the correct/new guests last name. If you are changing the booking to a guest who is already in the system you can select that guest from the EZ-Search drop down. Upon selecting the new guest from the EZ Search drop down all guest information will be updated. Click Save or Save and go to Front Desk and you're done.
- Enter the new guests information and click Save.
- Once a reservation has been cancelled, checked out or declared a no-show, the following fields are not editable: arrival date, departure date, rate, rate type, room type and room number.
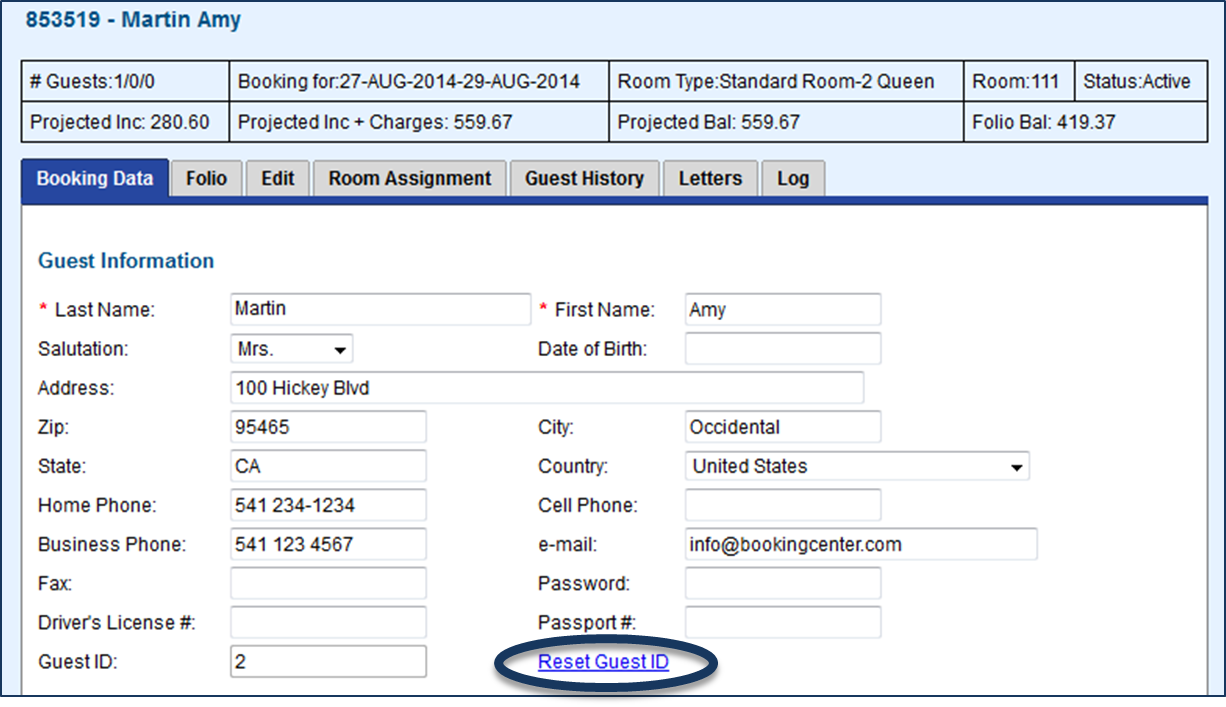 Image Added Image Added
Repeat as necessary.
|