Page History
| Section | ||||||||||||||||
|---|---|---|---|---|---|---|---|---|---|---|---|---|---|---|---|---|
|
| Section |
|---|
When a Guest clicks on the Self Check-in link and logs into in to MyBooking, they can:
All changes made by the guest are automatically updated to MyPMS. When a guest cancels a booking in MyBooking, the booking will update in MyPMS and the status will change to Cancelled. Likewise, any changes made to Guest Details is automatically updated to the Guest Booking Information in MyPMS. Below is a step-by-step User Guide for the Self Check-in - MyBooking. |
In MyBooking - Top Header will always the following Booking information
Below is a step-by-step User Guide for the Self Check-in - MyBooking. |
Self Check-in Criteria
- Room Not Assigned
- Room Occupied (previous guest not checked out)
- No Credit Card not in Guaranteed By
Then, depending on date of login and the status of the booking the criteria met in MyPMS, a message will display directing the Guest on what to do next or the "Check-in" button will display allowing the guest to check-in. Read below for a detailed description of what happens when a guest logs in to MyBooking.
Date of Login
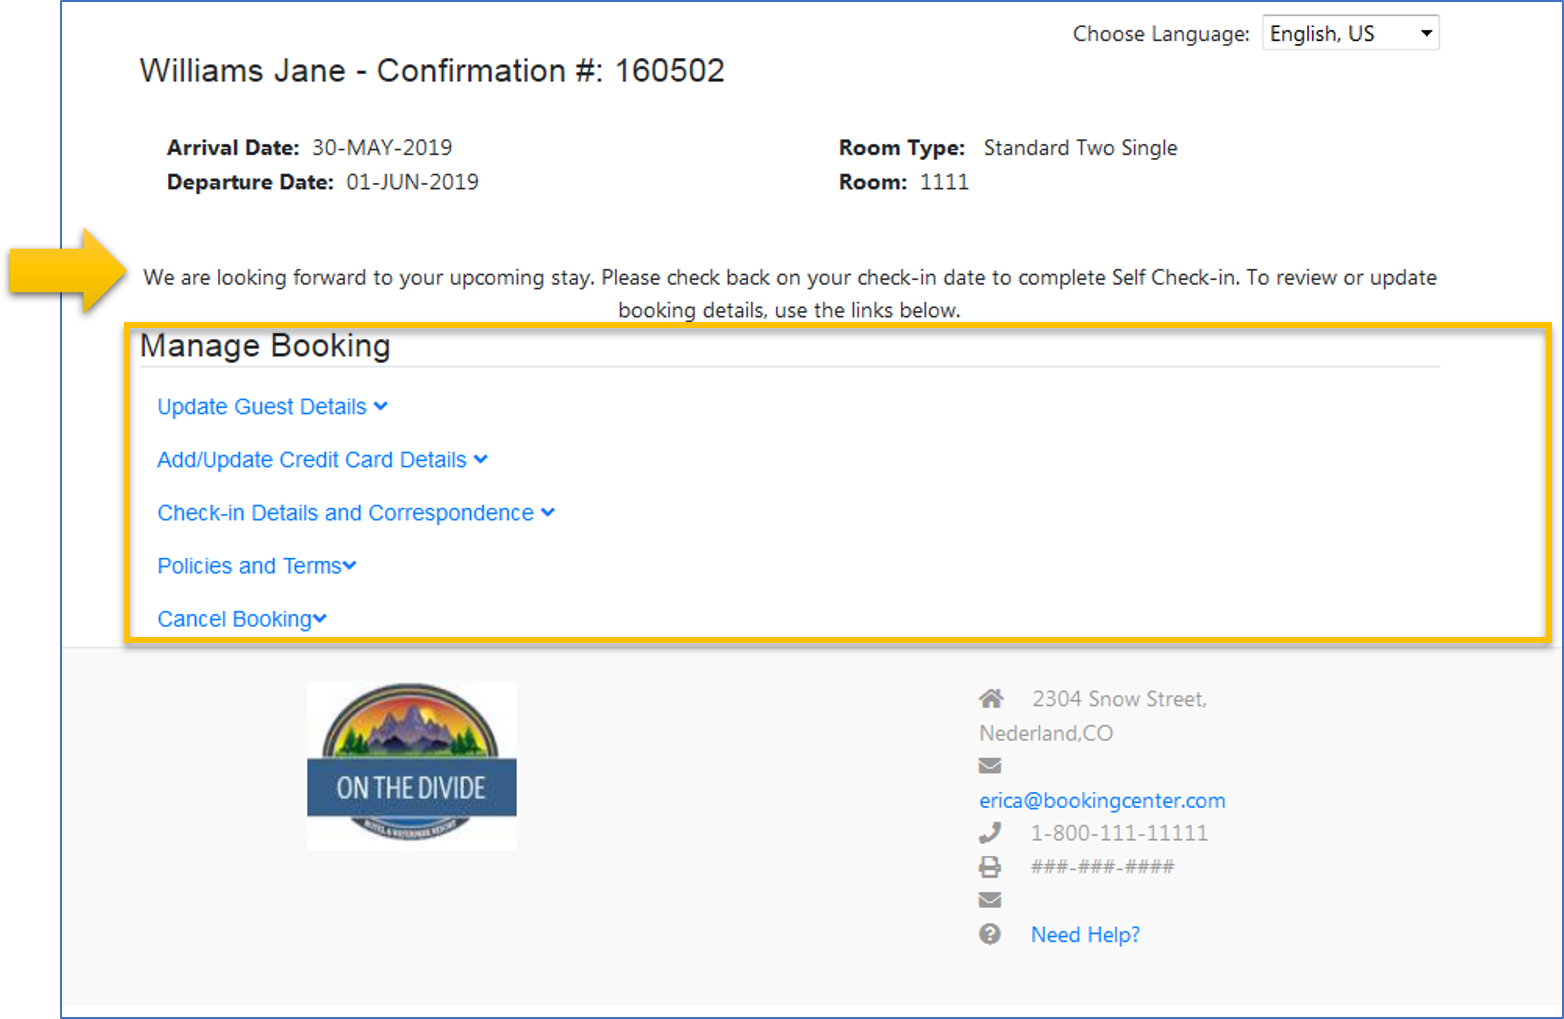
- If the Guest logs in BEFORE the Arrival date, then the guest will only be able to use MyBooking to update Booking Details and Payment Method, View Correspondence and Policies and Cancel the Booking. The "Check-in" button will not display to the Guest before the Arrival Date.
- This message will display to Guest "We are looking forward to your upcoming stay. Please check back on your check-in date to complete Self Check-in. To review or update booking details, use the links below."
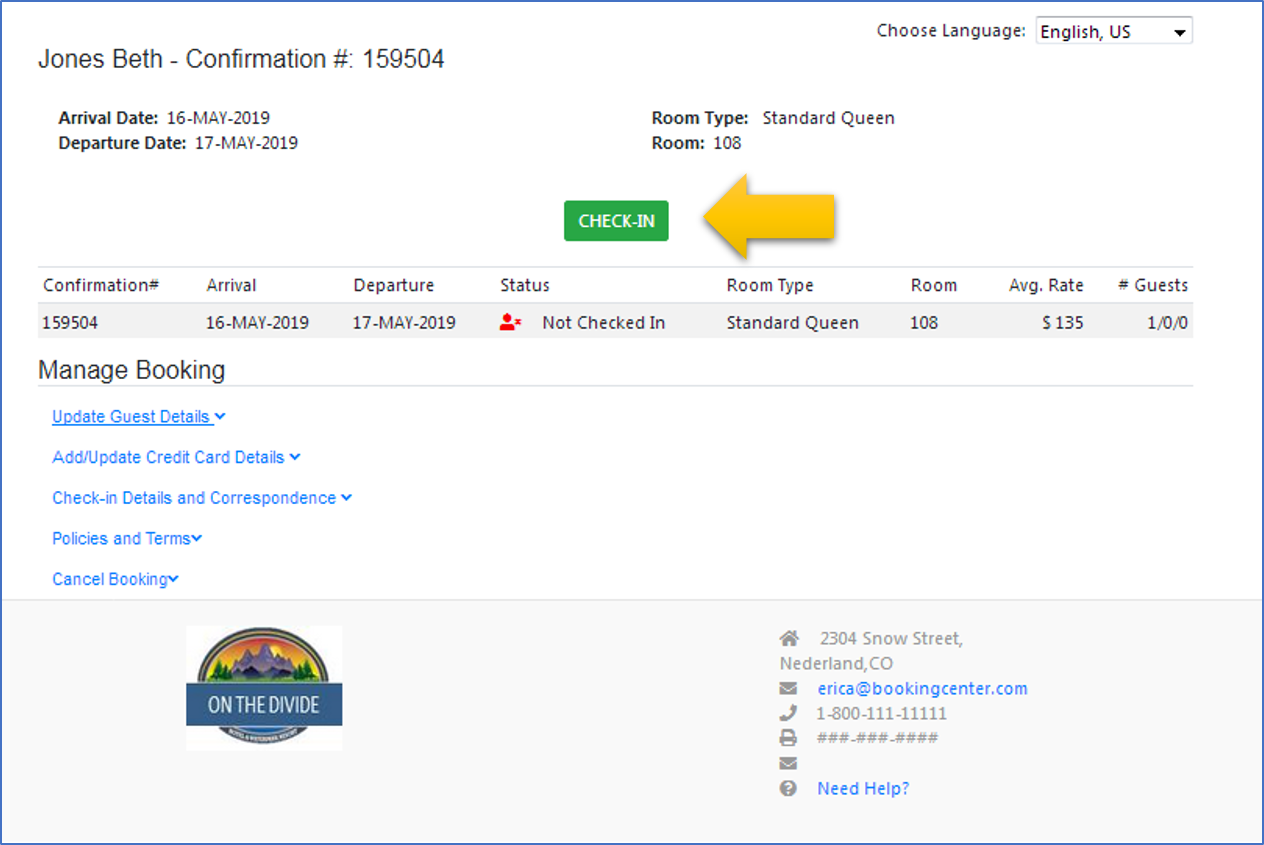
- If the Guest logs in ON the Arrival Date,
- Then the "Check-in" button will display if all criteria is met in MyPMS.
- If the criteria has not been met, then a message will display to Guest with next action.
- This message will display to Guest
Number of Rooms Booked
- If the Guest has only one room booked, then only the booking details will display for that particular booking..
- If the Guest has a multi-room booking, then ALL of the bookings under that Guest Name for check-in that day will display. The Guest can click on each booking to view and update details.
Self Check-in Criteria
Room Not Assigned
Room Occupied (previous guest not checked out)
No Credit Card not in Guaranteed By
- "We are looking forward to your upcoming stay. Please check back on your check-in date to complete Self Check-in. To review or update booking details, use the links below. "
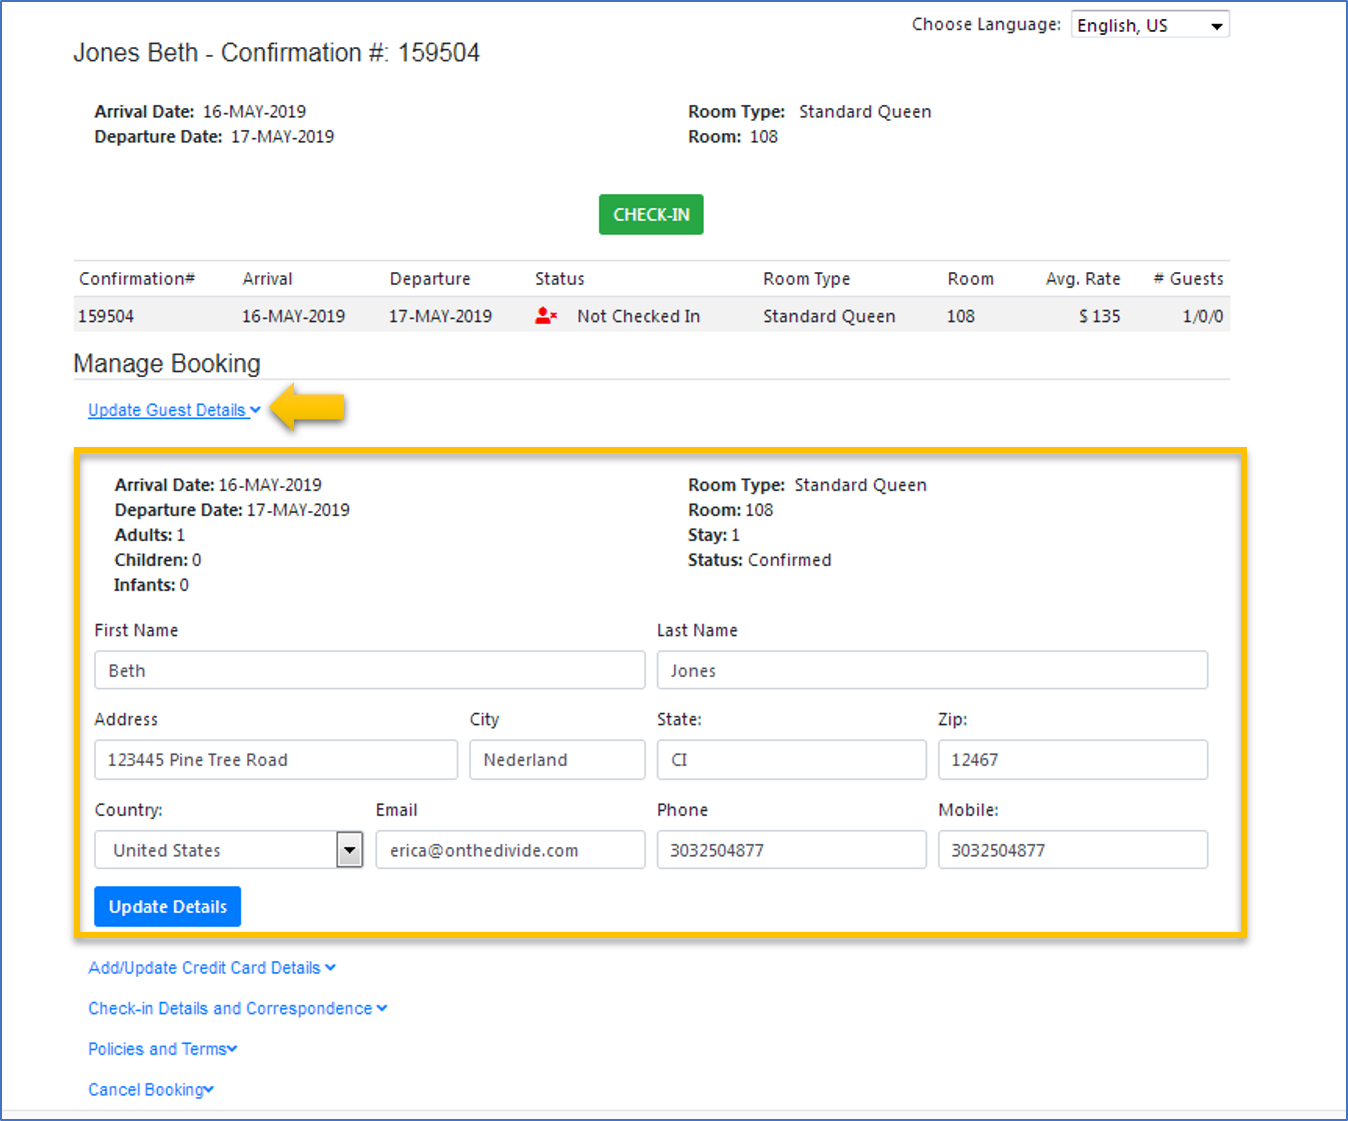
| Update Guest Details |
|---|
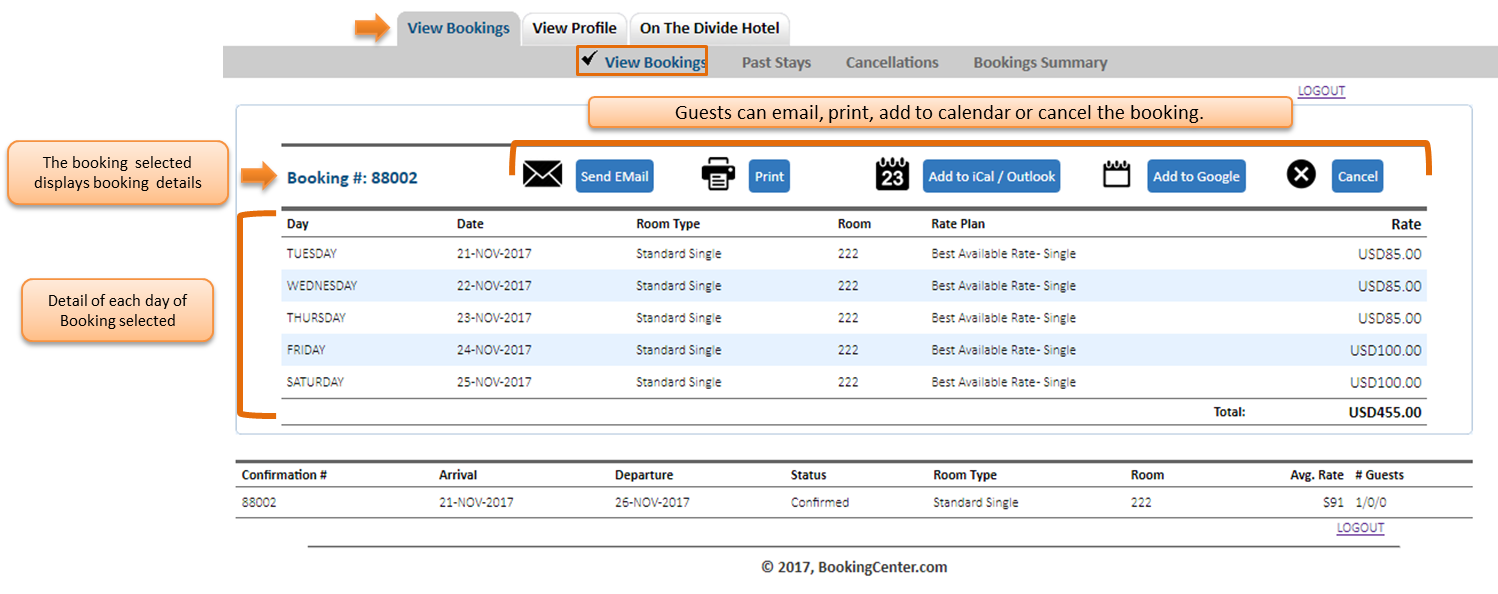
Displays a list of all upcoming Confirmed Bookings.
By clicking on a booking in the list, the booking details expand
Click image to enlarge
Click image to enlarge
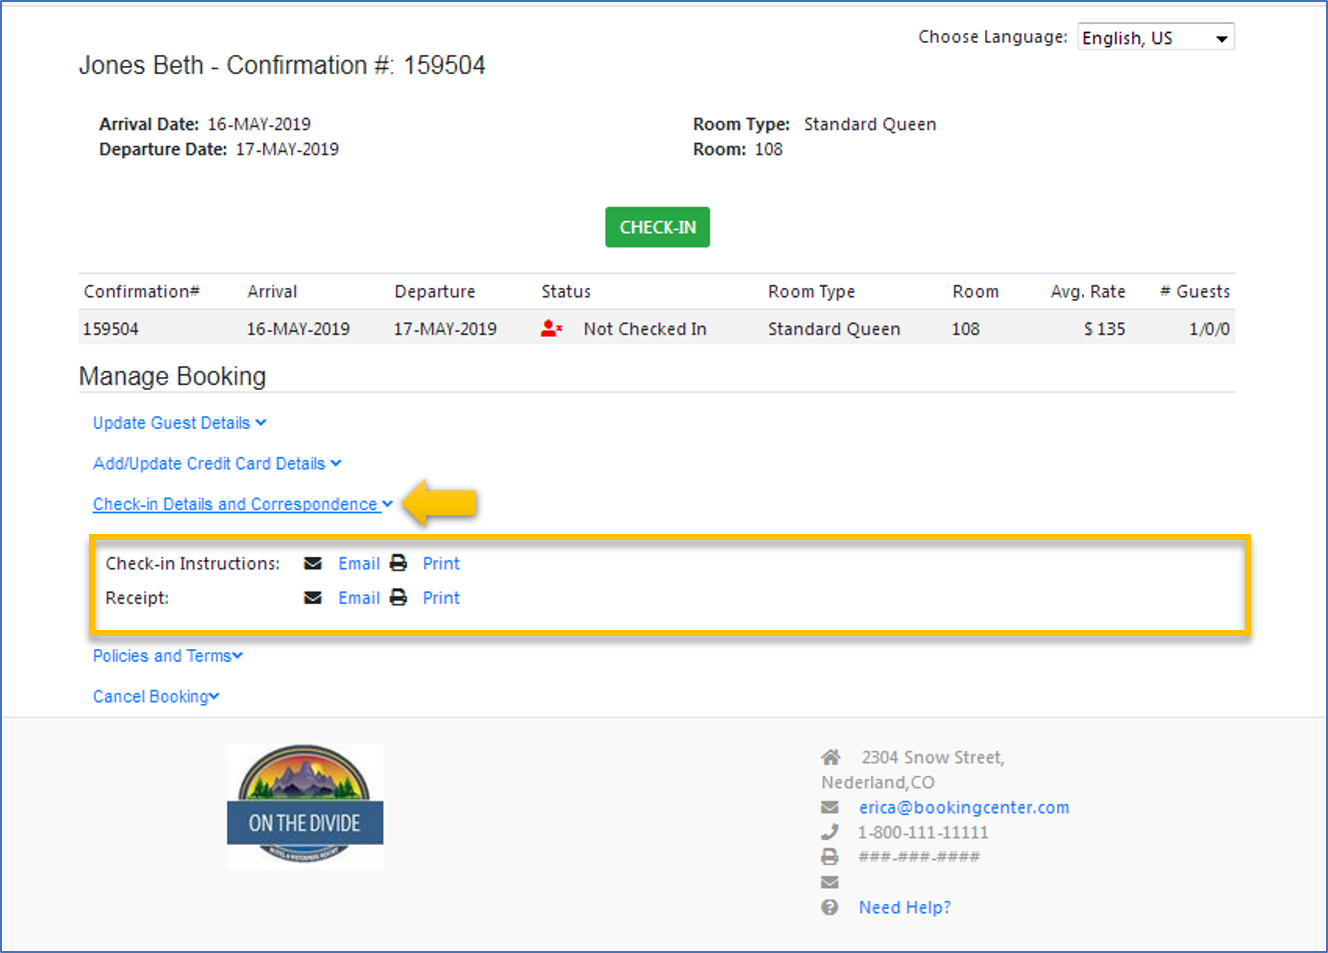
Email/Print Booking Details
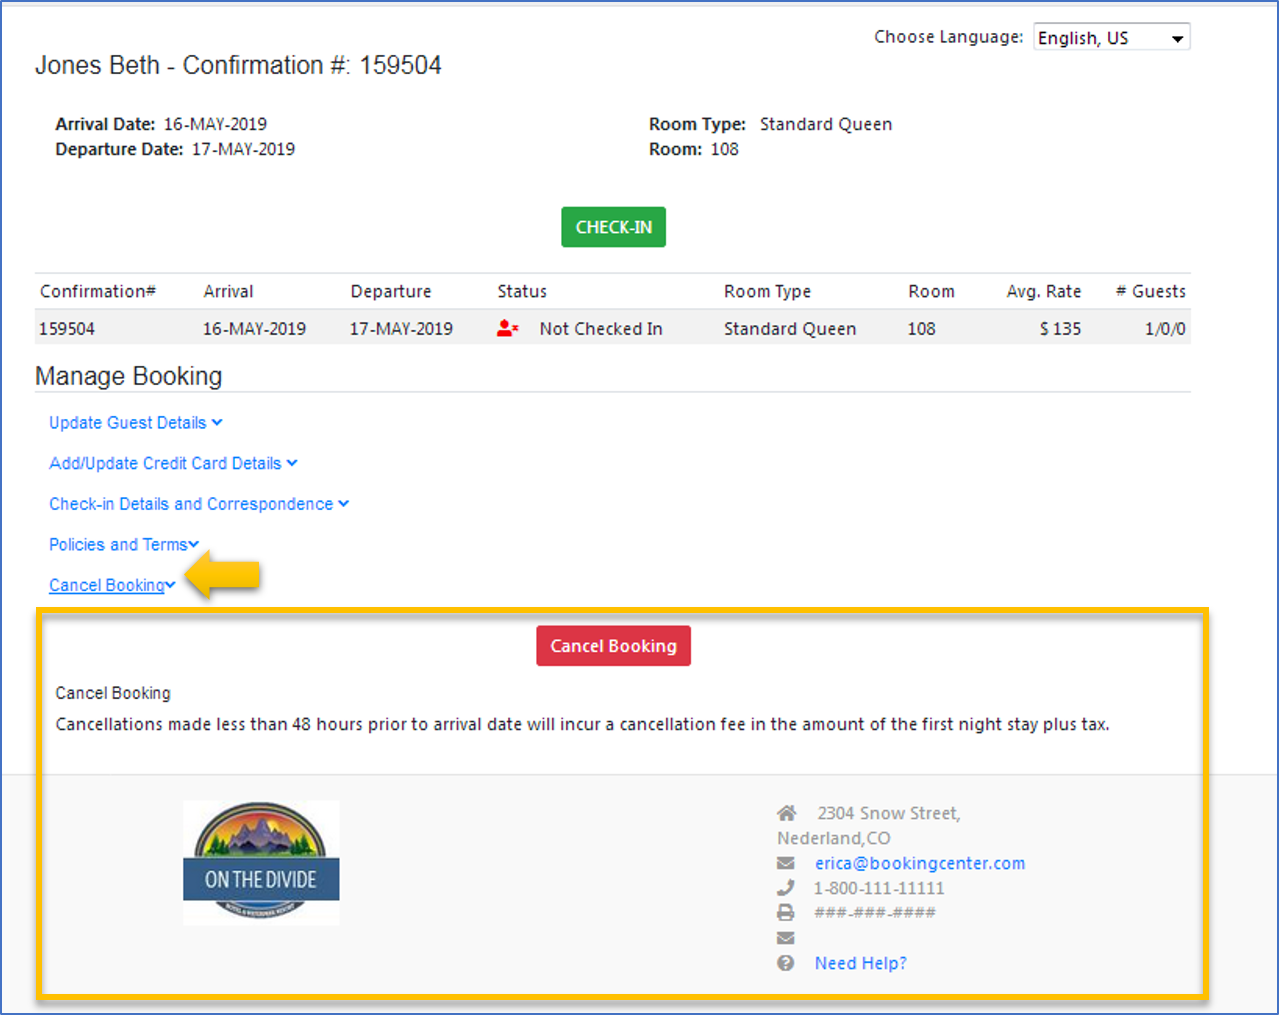
Cancel Booking
Click image to enlarge
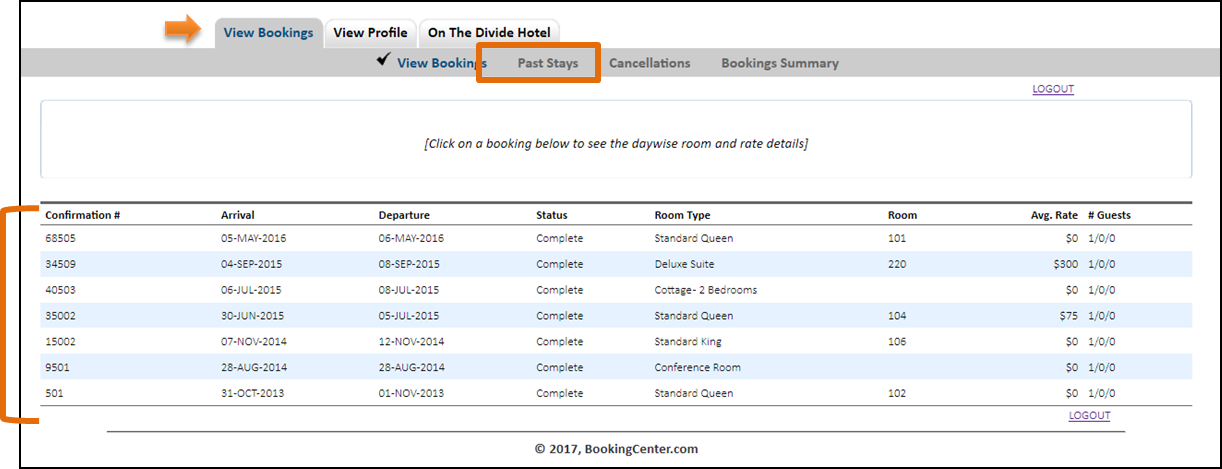
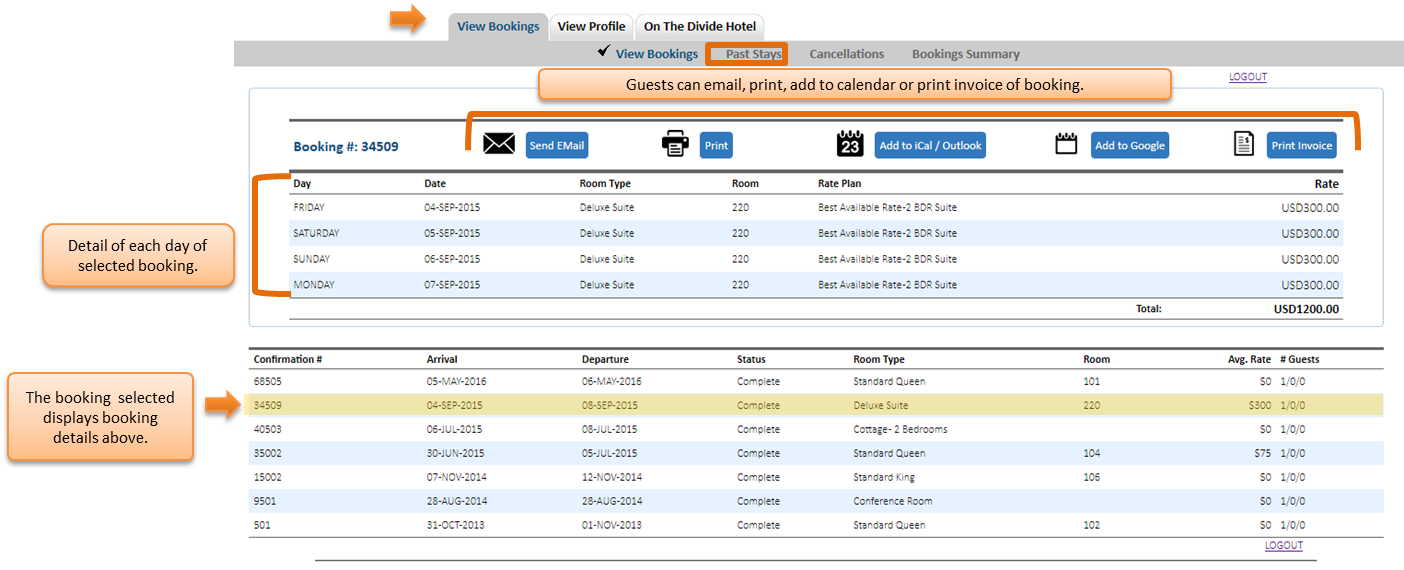
Displays a list of all past Completed Bookings.
Click image to enlarge
By clicking on a booking in the list, the booking details expand and displays detailed room type, room and rate information for each day of the booking. The Guest is also give the option to email, print, add to calendar or print an invoice.
Displays a list of all Cancelled Bookings

Click image to enlarge
Click image to enlarge
Displays Guest Details as entered in the Booking Data Tab in MyPMS as well as additional fields for Dietary Requirements, etc.
The Guest can click Edit to enter more information or modify the existing information.
Click image to enlarge
 Click image to enlarge
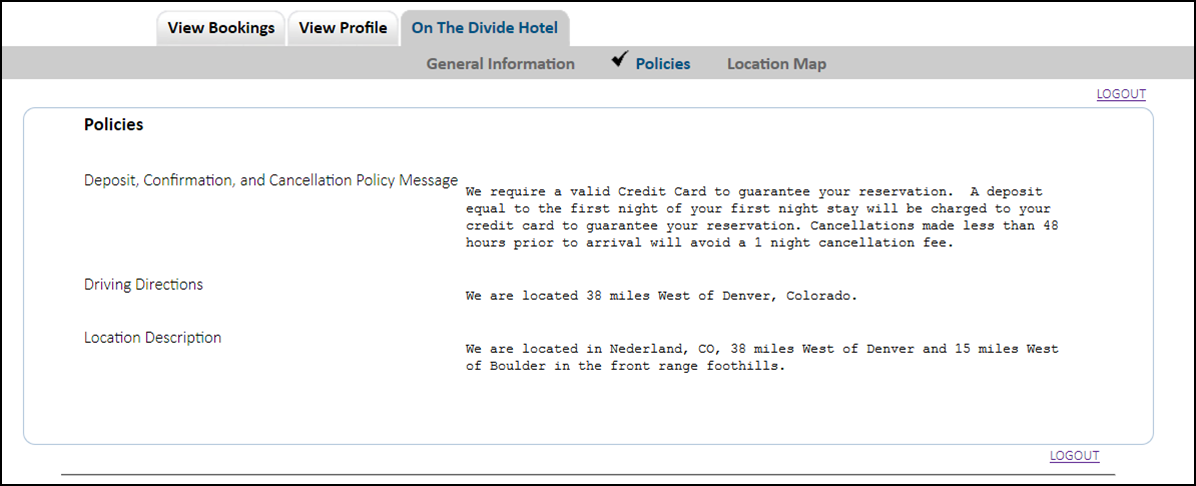
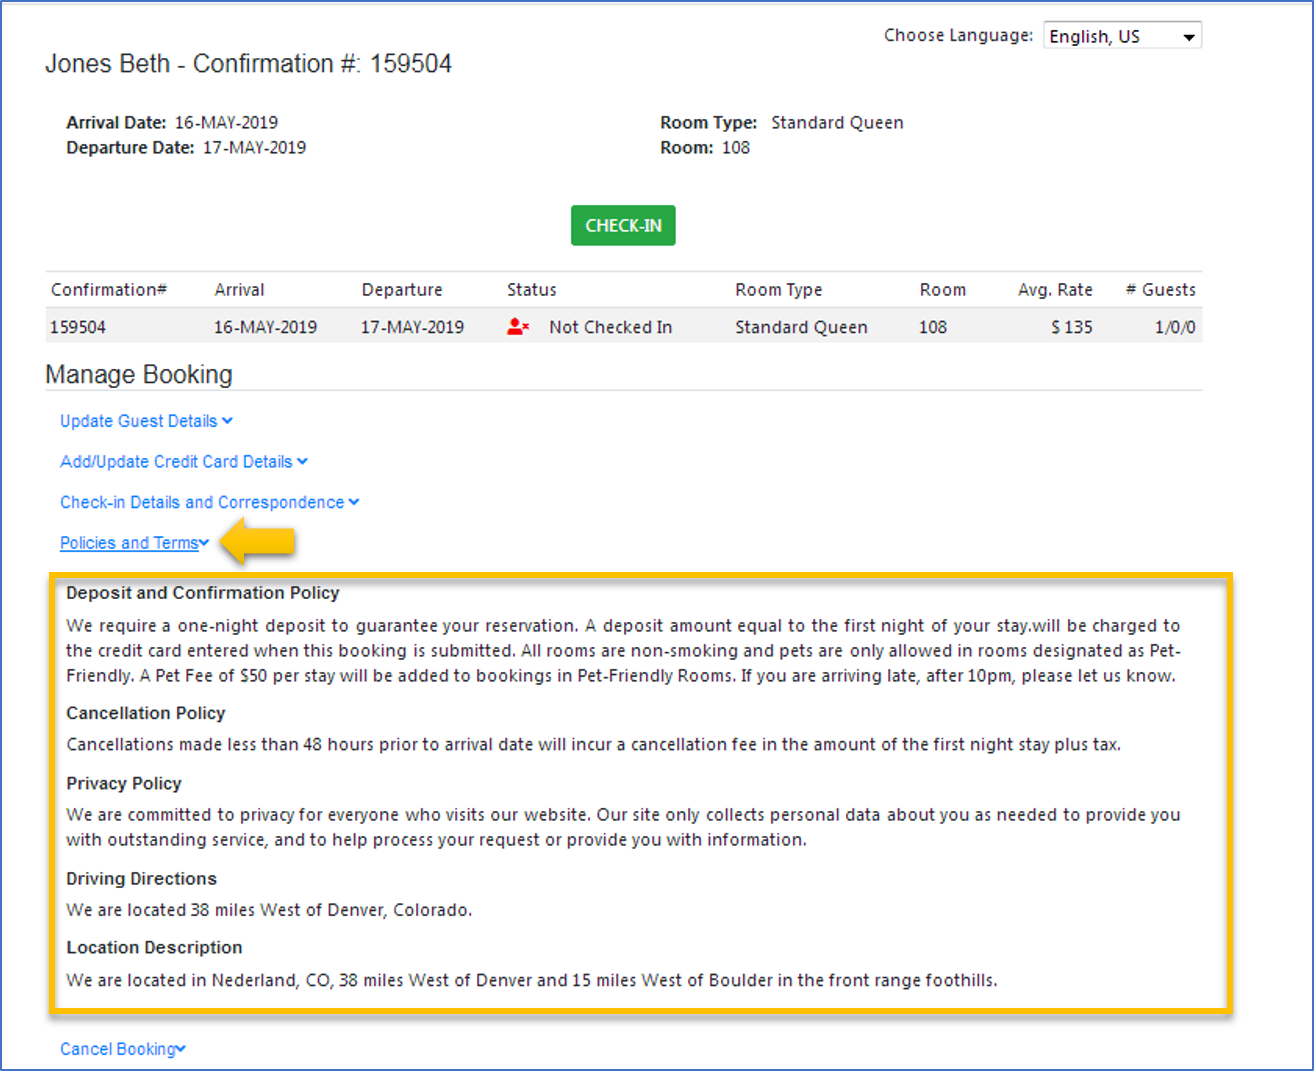
Deposit, Confirmation, and Cancellation Policy Message.The information displayed here is entered in MyPMS in SETUP | SETTINGS | MARKETING AND POLICIES. See Marketing And Policies
Click image to enlarge
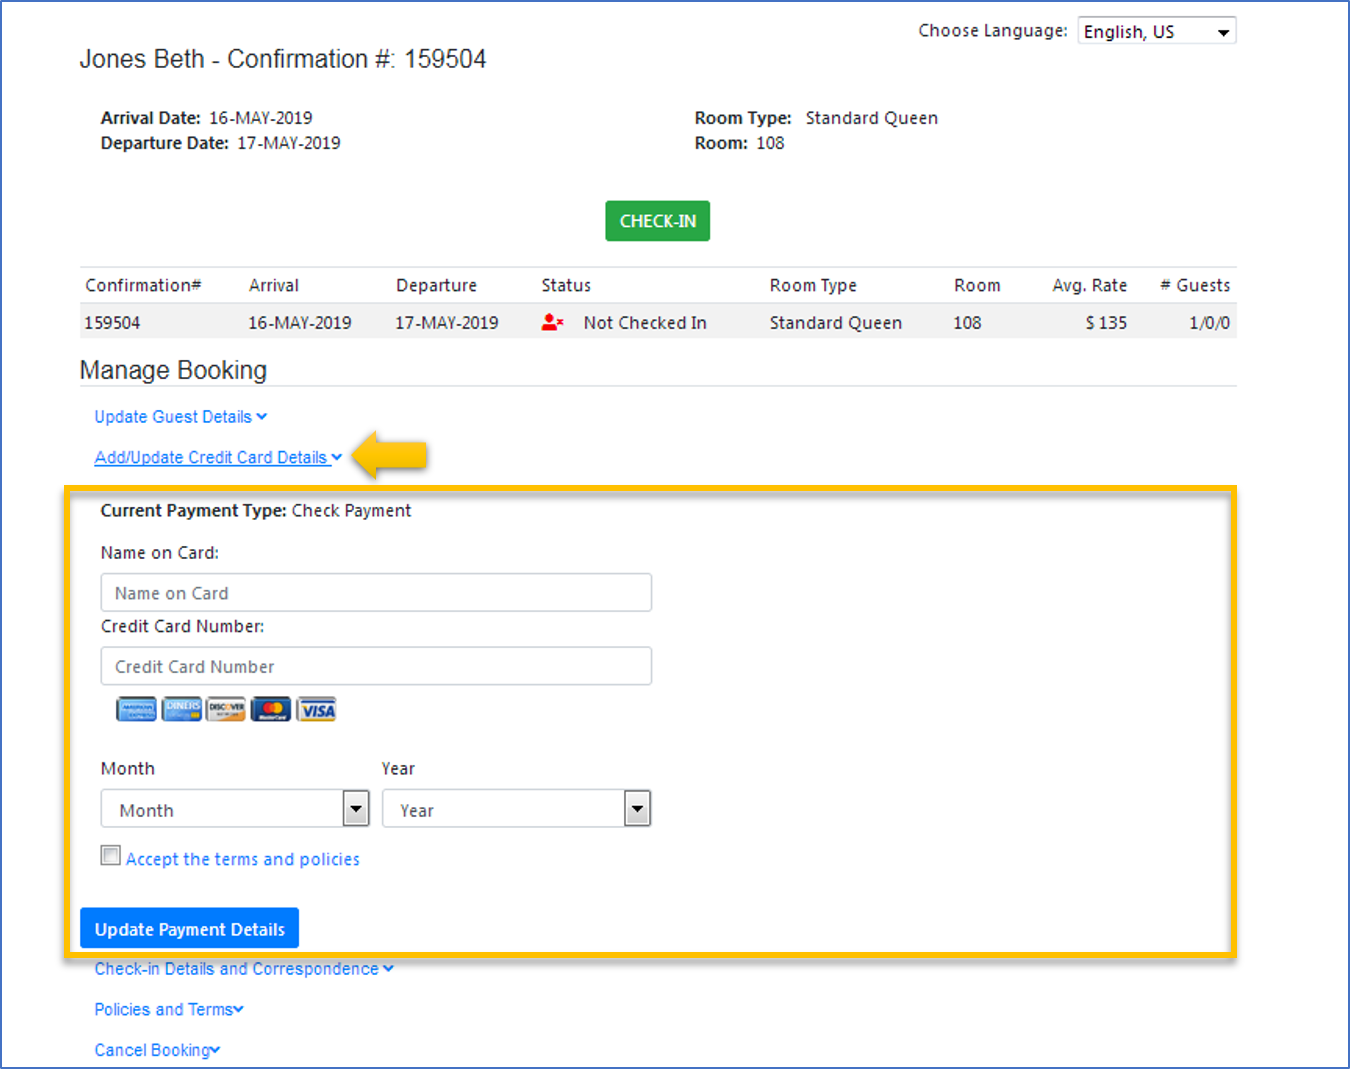
| Add/Update Payment Method | Correspondence and Statements | Policies and Terms | Cancel Booking | |
|---|---|---|---|---|
 |
|
|
|
|
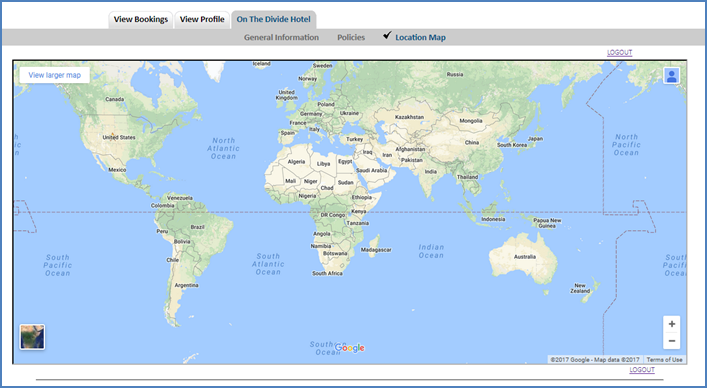
Interactive map showing property location. This map is automatically displayed with your location. Location is entered in MyPMS in SETUP | SETTINGS | GENERAL SETTINGS. Under Geography Section - Latitude and Longitude. See General Settings
Overview
Content Tools